Want to stay in touch? Become a 'Golden Ticket Member' (for FREE) for exclusive discounts + sales + freebies + news. Yes, please!
Showing posts with label gift ideas. Show all posts

Tuesday, 7 June 2016

Introducing Fellow Madeit Seller - Lauren - from 'Ayana Jewellery'


As I love encouraging others, particularly those that handcraft items, I thought I would dedicate a blogpost once a month, sharing some information about other handcrafters that I have met.

This month I have great pleasure to introduce to you, Lauren from 'Ayana Jewellery'.

 Lauren is a very skilled jewellery maker that handcrafts rings, earrings, bracelets and necklaces. I met Lauren through the handmade market site, Madeit. I asked Lauren a few questions about her craft. Grab a cup of tea and enjoy reading about her journey ...


Tell us a bit about 'Ayana Jewellery'.

Behind Ayana Jewellery is myself and my partner Vincent. While I develop, design and handmake each item, Vincent supports me with the business side of things from marketing to bouncing ideas.
After studying as a silversmith in New Zealand, I moved to London where I met Vincent. Together
the journey of Ayana Jewellery began. I spend long evenings in my bedroom apartment making and designing jewellery. Vincent helping where he could.

We re-located to Sydney in early 2015 and re-launched Ayana Jewellery. We now design and make contemporary fashion accessories from our creative home studio in Neutral Bay (Sydney).
The artistic inspiration for our products comes from our travels. The ones ‘desire’ to see, feel, taste and yearn.
Resonating from cultural motifs to architectural shapes and forms.
Each jewellery item in our range is handcrafted with love from start to finish, with each piece not quite the same as the one before. We design and make with the fun loving women in mind and the idea that jewellery is to be worn and enjoyed every day. 


What do you like most about being a handmade designer/creator?


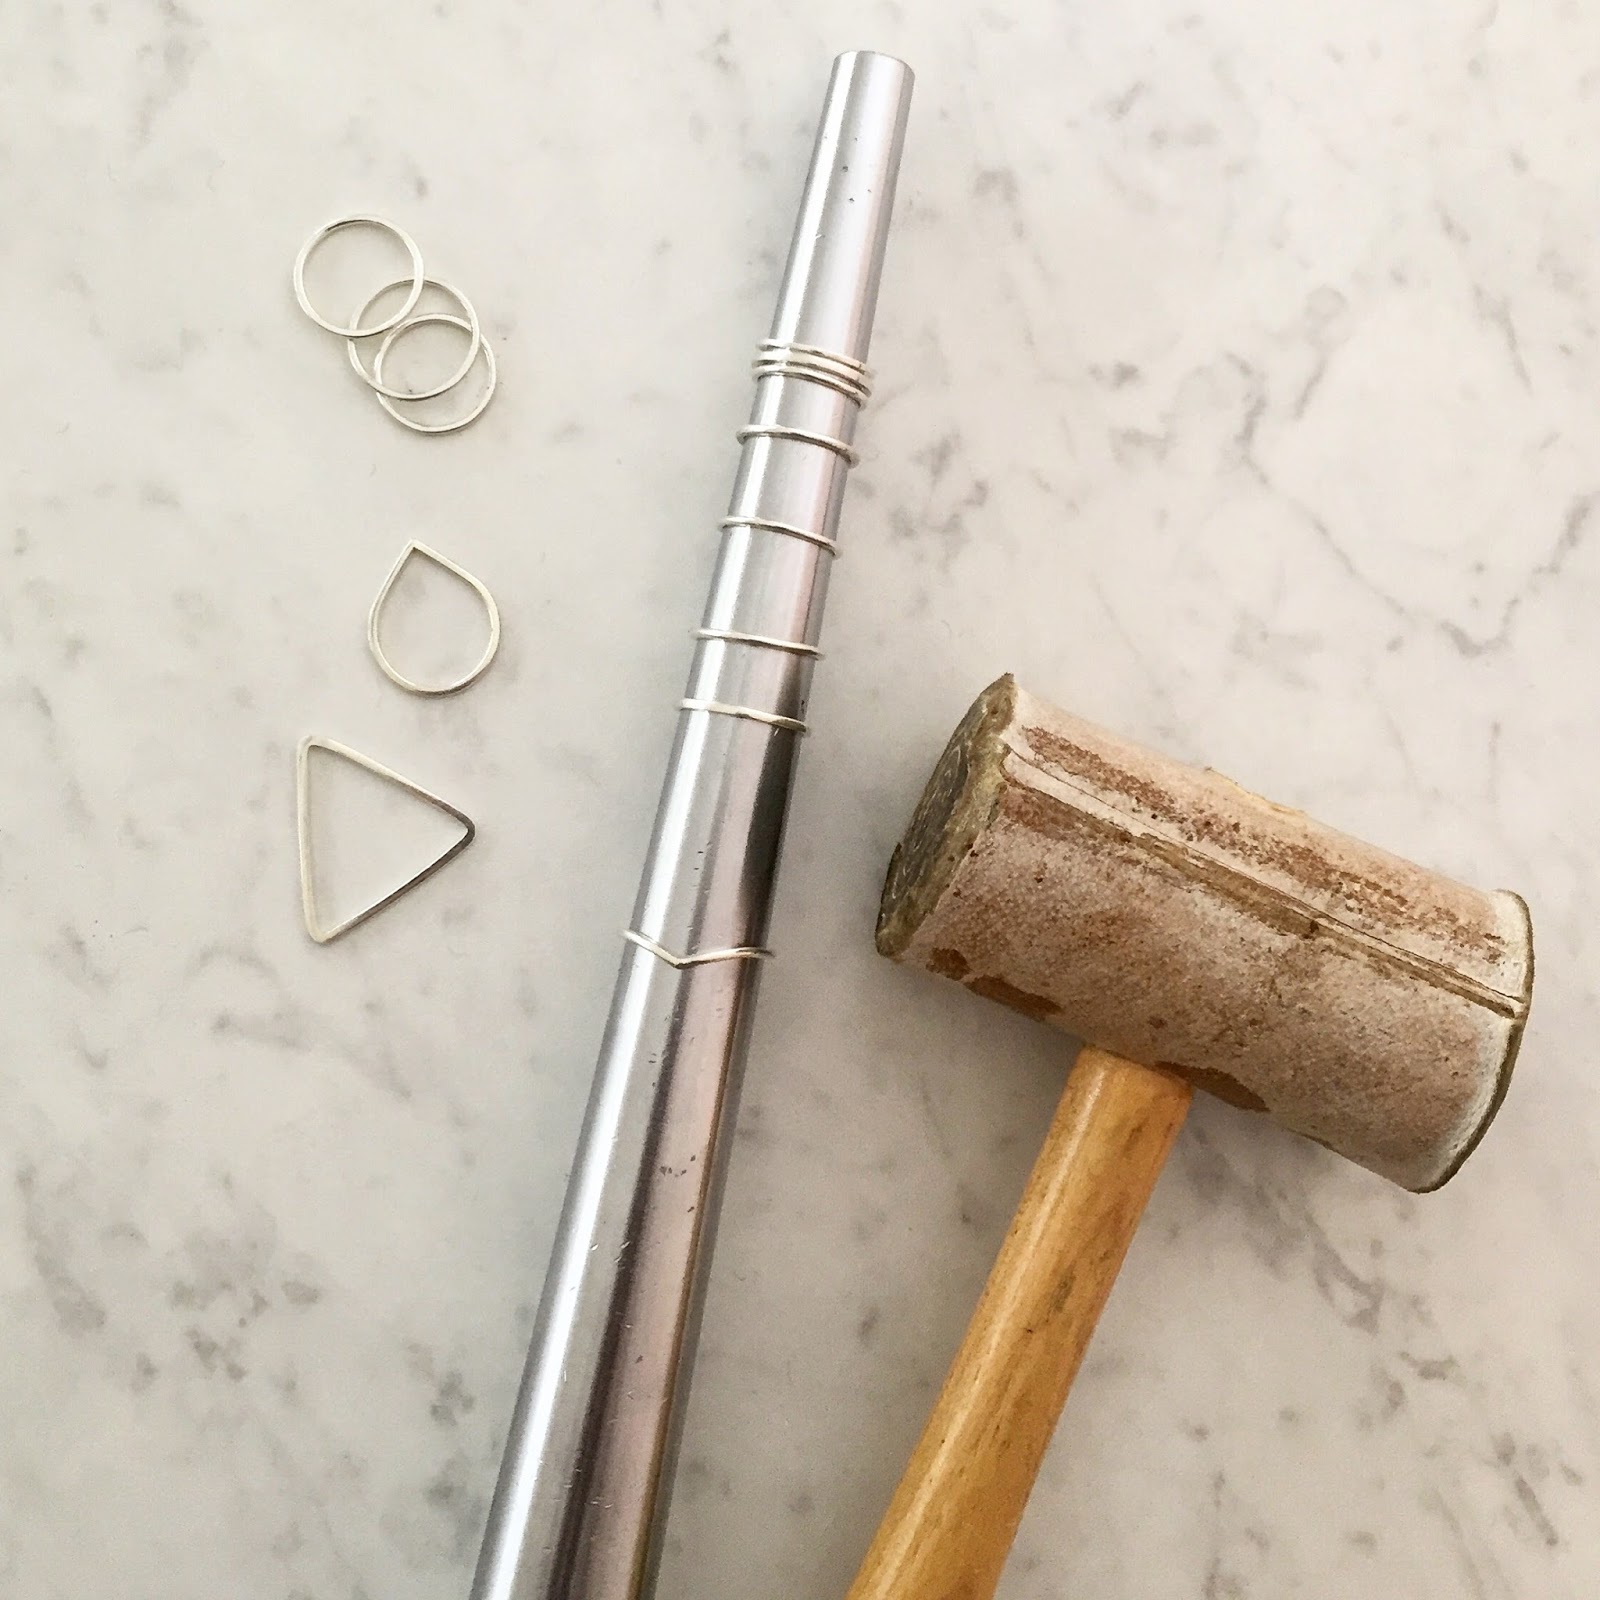
I predominately work with sterling silver (925) so popping on my apron and taking to the bench with saws, hammers and solder to bend, curve and form shapes making the jewellery come to life has to be my favourite part of being a creator. On the other side, I just love when I sell something and get awesome feedback from the customer - you never stop getting that little buzz!


Why did you choose to create jewellery?
I never really know how to answer this question - I just love jewellery and it fascinated me that I could create my own from a few lengths of wire, some sheets of silver and a soldering torch. After doing a night course I was hooked and went on to do a full-time course.


What is next? Do you have any new products/designs/ideas planned?
We have just started doing markets in Sydney which are awesome and a great way to interact with customers, so we'll be doing more of those in the next few months. We also have a new range of Drop Designs which we have tested at the markets, they will be going up online in the next few weeks.
Our plan for the next few months is to get our jewellery into a few more shops and get more locally handmade items out there whilst educating the customers so they can understand and appreciate "handmade". We are already stocked with Bonty in Canberra, Boxable Gift Boxes and will soon be in Manly Gallery.


Thank you Lauren for sharing about your handcrafting journey and your beautiful products. I love the simplistic, modern design of your jewellery and I wish you all the best in your endeavours.

If you would like to view more Ayana Jewellery products, simply click here to view what is in store.

Thank you for viewing!

~ Jen

P.S - If you have enjoyed reading about other handcrafters and want to know more about Tupsy Turvy Designs, why not become a 'Golden Ticket Member'? It is FREE and membership entitles you to regular updates, exclusive sales, discounts and opportunities. Simply click here and enter your email address. Easy! I look forward to sharing more ideas with you soon ...

Monday, 8 February 2016

Home, sweet home! New home canvas designs


Some days are busy ... I have decided to go back to my day job two days a week since both of my boys are at school this year. Due to my organisational side, I have timetabled my time, so that I can fit in my crafty work, housework and any preparation needed for my day job during the week. Needless to say, I am working very hard with the time that I have on the days that the boys are at school. On my working days, I have to be very organised so that dinner can be on the table, homework done and the house clean with the very little time that I have when I come home. However, I am enjoying it! I am loving the big blocks of time that I have to get work completed. I am also enjoying the couple of days allocated to me with my day job - keeping my skills in touch.

Home is a place where I work. Home is a place that I organise and clean. Home is a sanctuary from stresses and worries. Home is a place where I nurture my family. Home is a place where I can relax and enjoy my own activities. Depending on our circumstances and focus, home may look very different, but there may be aspects that are very similar.

I have added to the 'home' canvas design by creating two different looking ones, both sparked by a custom order...

I wanted to create another 'traditional' looking house - one with straight sides and triangular roof, however, this one has one central chimney, rounded door and one rectangular window (complete with lacy curtain).


The second one is a little more modern in design, with rounded roof and small circular windows (with little lacy curtains).

Both have been created to add a little decorative, homely warmth to a house and a reminder that we are blessed to have a home to raise our families, to play in and to relax in.

Thanks for stopping by! Until next time ...
~ Jen.

P.S - If you would like to stay in touch with news about products and participate in exclusive discounts and promotions, why not become a 'Golden Ticket Member'! It is FREE to join up ... simply add your email here.

Tuesday, 19 January 2016

Valentine's Day Gift Guide Full of Handmade Goodness


Hi Friend!

It is sometimes tricky to find something special and handmade to give a loved one. For those that participate in Valentine's Day, or simply like to find a beautiful handmade gift for a loved one, Madeit has released a Valentine's Day Gift Guide, making gift giving a more simple process.

This year, Tupsy Turvy Design's has been lucky enough to be featured in Madeit's Valentine's Day Gift Guide. I wonder if you can spot the item. To view, simply click here.

Thanks for stopping by!
~ Jen.

P.S - If you would like to keep in touch with news and what Tupsy Turvy Designs' has been up to (and be entitled to special discounts and exclusive events), why not become a 'Golden Ticket Member'? Membership is FREE and is simple as clicking here!

Tuesday, 27 October 2015

Pale Pink and Emerald Green


It's been a while since I have used some pink in my creations. I must say, I like pink in moderation as I am not as fond of combinations that use excessive amounts of pink. Despite this slight aversion to pink, I have made it the base of my colour combination. I didn't want too much pink, therefore I decided to add shades of emerald green to add some coolness to this combination.


The spark of this colour combination was a photo of a door. The photo consisted of a deep emerald green door that was the entrance to a pale pink dwelling. Whether it is the influence of this photo or of the colours themselves, these colours seem welcoming, kind and gentle.


As you can see, I have started making jewellery items using this colour combination. I also have another 'princess' canvas, a 'home' canvas and boat canvas in the pipeline that will reflect this gentle and kind mood.

I can't wait to share more of these items with you. In the meantime, if you would like to view jewellery items in store, please click here.

~ Jen.


Thursday, 8 October 2015

'Not a Worry' and a Princess Canvas


Have I mentioned that left to my own devices, I worry and stress? It seems to be getting worse as I age. As a teacher, I worry and stress about certain children, their learning environment and what parents must think.

Now as a mum I worry about my boys. This was my latest... We planned a spur of the moment holiday to Melbourne for a couple of days. I started to worry about losing them in the crowds, their safety, their behaviour around others and in a confined space like a train or hotel room... but that is me. If truth be told, parenting is unpredictable and we all have trying moments. It turns out that everything went smoothly and the boys were very good considering the circumstances.

When I stress and worry, I love feeling the flood of relief that everything is OK. For me, personally, my faith helps me tremendously as I can give these cares and worries over and release them. When worries and stresses are taken over, it is not only relief, but peace resides.


One of my latest canvases has the words "Peace fills her heart and gives her strength". This sweet girl faces the world without cares and boldly marches on. A peace and relief fills her and her worries are banished. She looks carefree with her ruffled, party dress and her short, wispy hair embellished with a simple hairband.

Hold your head high, princess...


To see if this canvas is available and to view others, please click here.

Thanks for viewing

~ Jen.

Tuesday, 22 September 2015

Pale Blue Flowers


Where I live, September is the beginning of Spring. I find Spring such an uplifting time - the weather begins to warm from the coolness of Winter, trees begin to grow back leaves and there is a splash of colour as new flowers bloom. Mind you, my hayfever does not always agree with my enthusiasm and raises its head a little during this time. 

My youngest boy is a bit of a nature lover. Every time we walk from the car and across the carpark at Kindergarten, he pulls me to a halt at the small garden edge as he looks for snails, different leaves or flowers.
Lately, I have noticed pretty little purple/blue bell shaped flowers that have appeared in amongst the other flowers and greenery. They are so delicate looking and neatly cascade down a green stem. My little one managed to spy them as well and also appreciated their beauty. He doesn't seem to worry about time or schedules, rather, he stops, gazes and appreciates the loveliness around him...


I have recently completed and released a series of pale blue, tiny canvases in the Tupsy Turvy Designs Madeit shop. Each canvas depicts a pale blue daisy, with brown middle, on a mixture of brown background. To me, the combination of light blue and chocolate brown evokes a quiet strength, therefore words such as 'Peace' and 'Be Strong' feature on these canvases. I wanted to make these canvases a source of encouragement when gazed upon. Their little size makes it the perfect height to sit on a window sill, shelf or office table (each canvas has its own wooden easel).

To view what is currently in store, please click here.

Thanks for viewing!
~ Jen.


Monday, 24 August 2015

Chocolate Brown and Light Blue


Since December last year, I have been a mother. My husband and I went through years of preparation and seminars as we journeyed through the adoption process. We learnt about how traumatic experiences effect the brain, how we can best manage children from traumatised backgrounds and generally prepared our living space for little people. Even though we both knew that eventually we would meet our children, nothing essentially prepares you for motherhood like having two little ones with you.

I must say, we are extremely blessed, not only to have two beautiful boys join our family, but have two beautiful boys that have slotted into life here and with us so well. It is definitely a credit to all involved in the process..

...However, as any parent knows, it is not all smooth sailing. There are days where dealing with tantrums and tears proves to be a challenge. They are the days when the children are all snuggled in bed that my husband and I relish breaking open some chocolate. Somehow the tasty, sweet treat makes a lot of the woes of the day seem much better. As I type this, I am smiling as yesterday was just 'one of those days'. As I snuggled into the recliner after all the cleaning up was finished, my husband broke off a little extra chocolate and stated that 'you probably need this after your day today'. Ah... he knows me well.


To me, the colour of chocolate evokes calmness, strength, stillness and peace. My newest colour scheme involves a range of chocolate brown hues teamed with a splash of light blue to lighten up the richness of the brown.

As you can see, I have already have used this colour combination for a range of pendants and earrings and I am about half way through a production line of cards. I have some ideas of using a teddy bear motif for one of my canvasses, a dog motif for another and a curly, short haired girl for my princess canvas. I can't wait to put all of these ideas into fruition. I would love to hear about your ideas, either by commenting on this blogpost, on the Facebook page or via email.


To see more items using this colour scheme, please click here.

~ Jen.

Thursday, 13 August 2015

A New Mixed Media Pendant Range


Everyone needs to go through change and this process is not easy. Today, after having long hair for ten or so years, I decided to visit the hairdresser and go short instead. It wasn't an easy decision. I scrolled through many suggestions that I found on the Internet. I then had to think about whether I liked these styles, my lack of time to style hair and whether it would suit me.Then, there was the fear that if I went with the short hair and I didn't like it, it would take a long time for it to grow back to a longer length.

Change can instill a bit of fear, however change can also be a time for celebration. It can be a time of letting go of the past and provides the opportunity to be open to new possibilities. Luckily for me, I am already embracing the change in hairstyle. I am enjoying these ease of styling and the lack of weight.

That being said, I am very thankful for thick hair to be able to have a choice whether to grow it long or have it cut and styled shorter. I am very well aware that some people, unfortunately, don't have that choice. Change that is out of our control can be especially distressing. Change unlocks so many emotions...


I've implemented some change in my line of mixed media jewellery and I am quite liking this change. Previously, I have adhered my mixed media art to buttons to create pendants and earrings. Due to a bit of inspiration when crafting with my sister-in-law, I decided to try framing small pieces of mixed media art in silver plated casings. To protect it, a glass dome is adhered on the front. This is the result...


Each of these pendants feature either a butterfly or small heart. I thought that the silver plated casing and glass dome not only add a bit of elegance, but will make them more robust. Each pendant comes with a ball chain. To see what is available in store, click here.

I would love to know what you think or which one is your favourite.

~Jen.

Monday, 27 July 2015

Craft Tutorial - Mixed Media Popstick Puzzle


I love discovering different ways to use mixed media techniques to make pretty gift ideas. This one is especially for children...

Puzzles can be a wonderful learning tool to help children remember concepts, use their fine motor skills and help with spatial awareness. Making your own puzzle does not require expensive materials... in fact, most of these materials can be found around the house. This puzzle also requires popsticks, which are inexpensive and are readily available.  

I decided to make a puzzle that will help in recognizing numbers 1-5, but this puzzle could easily be extended up to 10 or further simply by adding more popsticks. Rather than numbers, a child's name could be used in order to help the child to recognise and spell their own name.


Materials:

* Popsticks - I used 10 popsticks in my puzzle, but any number could be used.
* Masking Tape - to hold the sticks together in the process of creation.
* Paints - White and other colours that you want to use. I used acrylic paint and chose a blue and yellow colour theme.
*Scissors
*Decoupage Glue (or you could possibly use PVA glue, thinned with water)
*Brush for the glue (a cotton bud could possibly work)
*Something to mix paint on (a plastic lid or plate would suffice)
* A permanent pen
*Paper - only need to be scrap paper. I used old book pages.
*Pencil
* Kitchen sponge and bubble wrap (optional) 
* Computer/printer or lettering stencil
*Craft knife and cutting mat


Step 1 - Line up the popsticks.


Step 2 - Place two lengths of masking tape over all the popsticks, one piece at the top and one piece on the bottom. This will stop the popsticks from moving when making the puzzle.


Step 3 - Turn the puzzle over (so that the tape is facing down) and paint the side facing up with white paint.


Step 4 - Once the white paint is dry, mix up a light hue of the main colour with some white and paint over the top. I chose blue.


Step 5 - Add a little more main colour to the light hue (to make it darker) and place a small amount on a kitchen sponge.


Step 6 - Sponge over the top of the popsticks, making sure some of the lightest hue is still showing. If you don't have a spare kitchen sponge, use a brush, cotton wool ball or even your fingers.


Step 7 - Add more main colour to the mixed paint (to make it a little darker still) and place a small amount on the bumpy part of bubble wrap.


Step 8 - Print it over the popsticks, ensuring that the lightest hue and some of the kitchen sponging is still showing.


Step 9 - Using a computer or lettering stencil, create the main image that is desired on the puzzle. In my case, I needed large numbers from 1-5 and small number words.


Step 10 - Cut out the numbers (or letters) with the scissors.


Step 11 - Turn the numbers (or letters) over so that they look back to front and glue them onto the scrap paper using the decoupage glue. Paint a thin layer of decoupage glue over the top of the numbers as well. They will need to be back to front as the other side will be showing, the printed numbers will act like a stencil.


Step 12 - Once dry, carefully cut around the numbers or letters with the scissors...


... so when they are turned over, they look like this.


Step 13 - Position the numbers or letters on the popsticks and arrange accordingly. Once happy with their positioning, adhere the numbers or letters to the popsticks with the decoupage glue. Paint a thin layer of glue over the top of the numbers or letters.


Step 14 - Once dry, paint over the letters or numbers with a layer of white paint, being careful to keep the white paint on the numbers/letters and not on the popstick background.


Step 15 - Once dry, paint over the numbers or letters with your chosen colour. I decided to add a little brightness, so I painted my numbers in yellow.


Step 16 - This is rather an optional step, however, I wanted to add the number 'words' to the puzzle. I typed up the words that I wanted on a computer and printed them out. I cut out the words with scissors and glued them down on the popsticks with the decoupage glue. I also placed a thin layer of decoupage glue on top of the words. You could do the same with any chosen words according to your puzzle theme.


Step 17 - Once dry, outline the numbers or letters and words with the permanent marker.


Step 18 - I needed to tie in the yellow that I used for the numbers with the popstick background, so I placed a little bit of yellow on my finger and smudged it in a few places on the popstick background. If a very different colour is used for the letters or numbers, you may wish to do the same.


Step 18 - Turn over the puzzle so that the plain wooden background is facing up. Take off  the masking tape and carefully move the craft knife between the popsticks to cut them apart. Turn each popstick over so that the painted side is facing up. For durability, paint a thin layer of decoupage glue over each individual popstick.
 

Once dry, the puzzle is all set to be put back together again.

These popstick puzzles would be an ideal gift as a stocking stuffer or to place in a handbag for a toy that could be pulled out to entertain a child when out and about.

I would love to see your popstick puzzle design and final product. Feel free to let me know!

~Jen.

Thursday, 16 July 2015

A white flower on a stormy, grey background {mixed media}

I love storms - the ferociousness and power of them, but I dislike being in the midst of them. In fact, to be brutally honest, I am quite a 'scaredy cat' when thunder rolls and claps nearby. I think it all stems from learning about weather in my teens. I had (and still do) a fascination with storms, tornadoes and clouds and read all about them from books from the library. From then on, I developed a healthy respect of the power or storms and the knowledge of what exactly lightning is and what strong winds can do.

It didn't help things when we had a powerful storm rip through my home area one Summer. I have never heard wind so loud before and the violence of the wind ended up bending TV antennas and uprooting some trees. This was coupled with pelting rain.


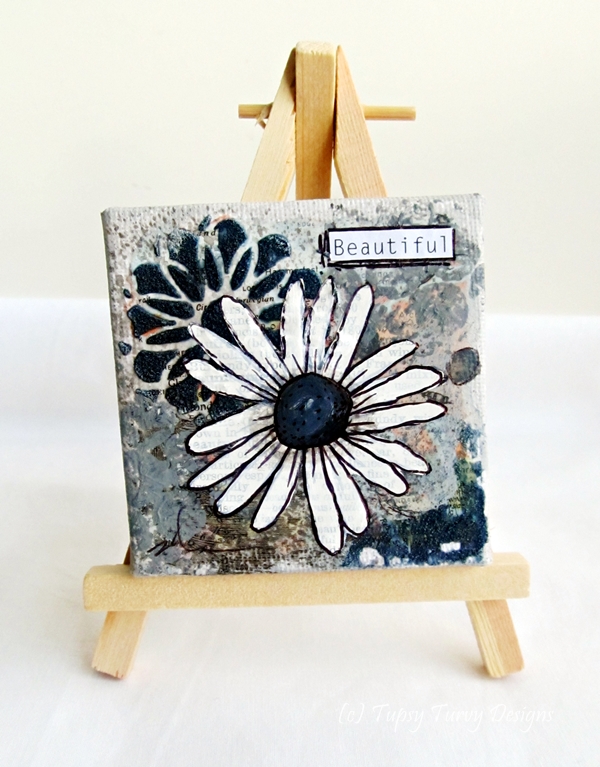
I would not have thought about this colour combination if it weren't for a custom order that I filled a little while ago. I fell in love with the stormy grey hues with the touch of navy blue. I knew that I wanted to create a set of flowers on tiny canvasses and the colour that I chose for the flower... white.


The next decision was working out words to place on these canvasses. The first word that I thought of was 'hope'. No matter what 'storms' are thrown at us, hope shines through, similar to the stark, white flower brightly blooming on the stormy, grey background.

I also thought about the word 'beautiful' - the purity and simplicity of the colour white being simply 'beautiful'. Words of encouragement and strength.

If you would like to view these canvasses in store, click here.

~Jen.

Saturday, 2 May 2015

Lemon yellow and Aqua blue tiny mixed media canvas

Last Christmas, I decided to treat myself. As I was buying little gifts to fill Christmas stockings, I found these tiny canvases in a shop. I thought that I would buy one and I would figure out what I would create later on. Well, I am glad that I made that purchase as this is the result and it is my favourite canvas to date...


I managed to add splashes of lemon yellow and aqua blue over the tiny canvas. The canvas is just big enough to place a daisy-like flower on the top, painted on a a book page and outlined/detailed with pen. With the combination of yellow and blue and the brightness that it creates, there couldn't be anything but happiness... hence the word 'Happiness'.

The great part about this canvas is that it comes with its own little easel, therefore it can be easily placed on a shelf, desktop, window sill, coffee table, etc. There are a few lovely ladies in my life that a tiny canvas like this would make the perfect gift.

I must admit, there are more of these little canvases on the studio table... I couldn't resist!

This item is currently in store. To view it, please click here.

~ Jen