Want to stay in touch? Become a 'Golden Ticket Member' (for FREE) for exclusive discounts + sales + freebies + news. Yes, please!
Showing posts with label celebration. Show all posts

Tuesday, 7 June 2016

Introducing Fellow Madeit Seller - Lauren - from 'Ayana Jewellery'


As I love encouraging others, particularly those that handcraft items, I thought I would dedicate a blogpost once a month, sharing some information about other handcrafters that I have met.

This month I have great pleasure to introduce to you, Lauren from 'Ayana Jewellery'.

 Lauren is a very skilled jewellery maker that handcrafts rings, earrings, bracelets and necklaces. I met Lauren through the handmade market site, Madeit. I asked Lauren a few questions about her craft. Grab a cup of tea and enjoy reading about her journey ...


Tell us a bit about 'Ayana Jewellery'.

Behind Ayana Jewellery is myself and my partner Vincent. While I develop, design and handmake each item, Vincent supports me with the business side of things from marketing to bouncing ideas.
After studying as a silversmith in New Zealand, I moved to London where I met Vincent. Together
the journey of Ayana Jewellery began. I spend long evenings in my bedroom apartment making and designing jewellery. Vincent helping where he could.

We re-located to Sydney in early 2015 and re-launched Ayana Jewellery. We now design and make contemporary fashion accessories from our creative home studio in Neutral Bay (Sydney).
The artistic inspiration for our products comes from our travels. The ones ‘desire’ to see, feel, taste and yearn.
Resonating from cultural motifs to architectural shapes and forms.
Each jewellery item in our range is handcrafted with love from start to finish, with each piece not quite the same as the one before. We design and make with the fun loving women in mind and the idea that jewellery is to be worn and enjoyed every day. 
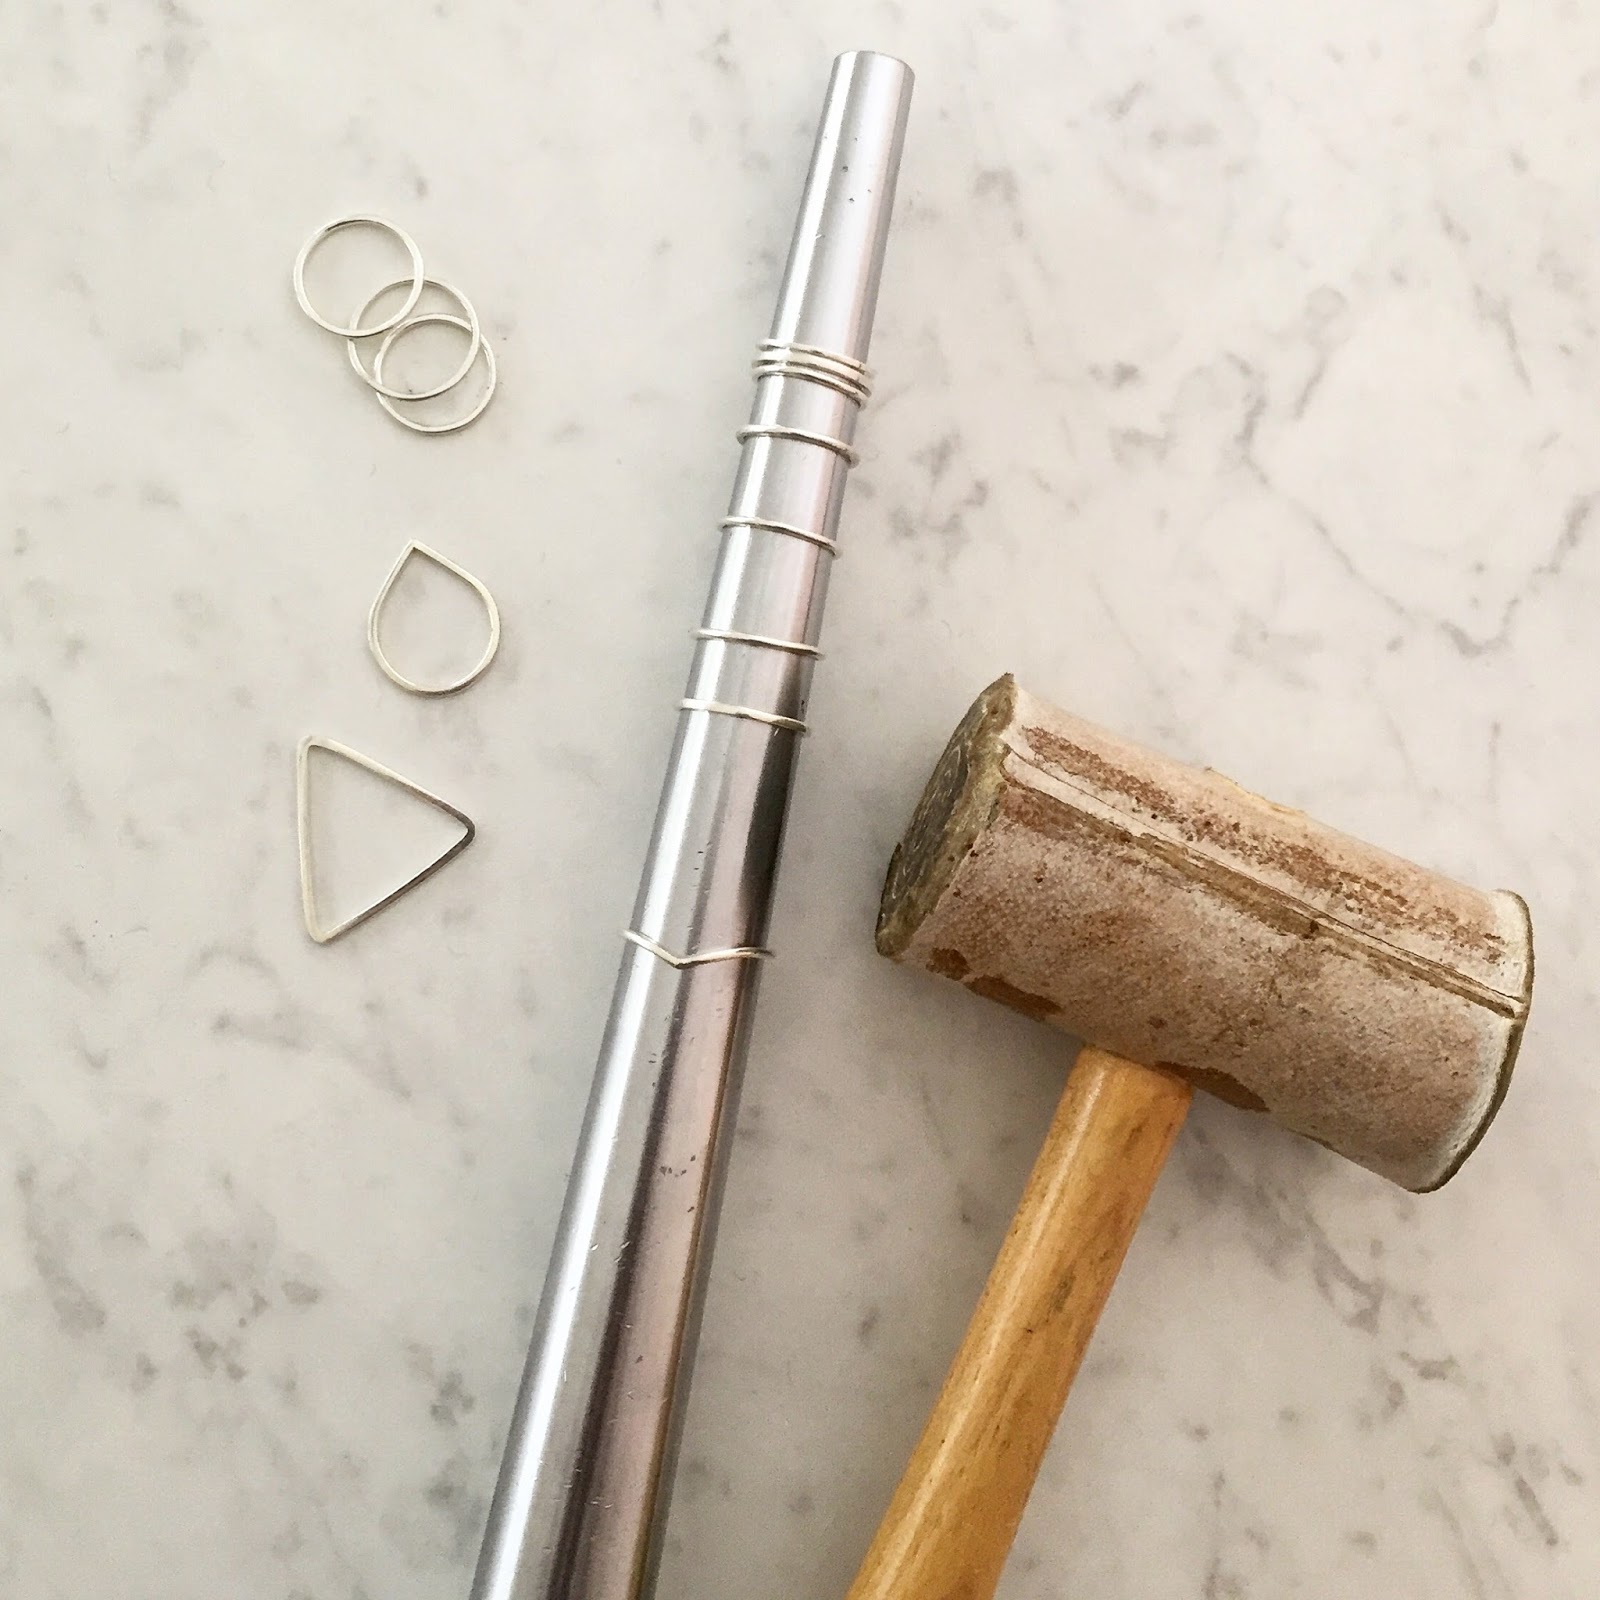

What do you like most about being a handmade designer/creator?


I predominately work with sterling silver (925) so popping on my apron and taking to the bench with saws, hammers and solder to bend, curve and form shapes making the jewellery come to life has to be my favourite part of being a creator. On the other side, I just love when I sell something and get awesome feedback from the customer - you never stop getting that little buzz!


Why did you choose to create jewellery?
I never really know how to answer this question - I just love jewellery and it fascinated me that I could create my own from a few lengths of wire, some sheets of silver and a soldering torch. After doing a night course I was hooked and went on to do a full-time course.


What is next? Do you have any new products/designs/ideas planned?
We have just started doing markets in Sydney which are awesome and a great way to interact with customers, so we'll be doing more of those in the next few months. We also have a new range of Drop Designs which we have tested at the markets, they will be going up online in the next few weeks.
Our plan for the next few months is to get our jewellery into a few more shops and get more locally handmade items out there whilst educating the customers so they can understand and appreciate "handmade". We are already stocked with Bonty in Canberra, Boxable Gift Boxes and will soon be in Manly Gallery.


Thank you Lauren for sharing about your handcrafting journey and your beautiful products. I love the simplistic, modern design of your jewellery and I wish you all the best in your endeavours.

If you would like to view more Ayana Jewellery products, simply click here to view what is in store.

Thank you for viewing!

~ Jen

P.S - If you have enjoyed reading about other handcrafters and want to know more about Tupsy Turvy Designs, why not become a 'Golden Ticket Member'? It is FREE and membership entitles you to regular updates, exclusive sales, discounts and opportunities. Simply click here and enter your email address. Easy! I look forward to sharing more ideas with you soon ...

Tuesday, 17 May 2016

Getting organised and greeting cards


A couple of weekends ago, we celebrated Mother's Day... 

Twelve months ago, I celebrated my first Mother's Day after what seemed like an epic age of heartache. Then, finally, I became a mother of two (very!) bouncy boys through adoption and my world changed. I now experience a different heartache: a heart aching with love my boys, a heartache when they are sick or upset, a heart aching with worry about problems, a heart aching with pride as I witness their amazing growth. It was a special day for me.

Mother's Day is also a time where I like to remind my mother and mother-in-law how much we all love them. I like researching easy, yet beautiful crafts that the boys and I can create together. However, there is only one problem with this ... I always leave the creation part to the last minute. I don't know how it happens ... I make up my mind what to create early enough and have everything ready, but the 'doing' part seems to happen days before it is due for giving. As it is, our creations are still drying and will be late in the post.

I often feel the temptation to 'pop into the shops', however, my creative streak is strong and the determination to make something personal overrides this. That is why I love handmade items and gifts - they are personal and created with love, whether you have made them yourself or bought from someone who enjoys creating. I love that I can have the help from my boys in creating these gifts and this year they have their hand prints (purposely) stamped with paint on them as a record of their growth in a year. Now, if I can only get myself more organised with birthday gift giving ...

Welcome to my new range of mixed media cards! I wanted a new design - something a bit more abstract and eclectic, however, I wanted to maintain the recycled/reclaimed material element. That is why every card uses a background consisting of a used book page. I initially wanted to add words to the card design, however, it just didn't look right, hence they are created without them. This has become a plus, as these cards are now free to be used for any occasion. Handmade cards are a wonderful way to convey personal greetings, particularly when each card incorporates a unique design.


These cards will soon be added to the store. To view what is currently in store, please click here.

Thanks for viewing!

~ Jen.

P.S - If you have enjoyed reading about the story behind Tupsy Turvy Designs' products, why not become a 'Golden Ticket Member'? It is FREE and membership entitles you to regular updates, exclusive sales, discounts and opportunities. Simply click here and enter your email address. Easy! I look forward to sharing more ideas with you soon ...

Thursday, 7 May 2015

Make your own party decorations - DIY Cupcake Topper Craft Tutorial

Special celebrations call for special surprises. Sometimes, special celebrations call for personalisation of decorations to match the person, their interests or their celebration. At times, purchasing decorations and celebratory items can get costly.


If you are looking for a simple decoration to pop on top of cupcakes or sweets, that will reflect the event or the special person, and will cost next to nothing (besides a little of your time), then this tutorial could be for you!


Items that you will need:
  • Water paints - borrow a water paint set from the children or add some water to acrylic paint to create your own water colour.
  • paint brush or cotton bud
  • scissors
  • pencil 
  • permanent marker
  • paper - I used an old book page, but anything that will allow water paint to be applied will suffice.
  • a coin - the size of the finished item or a circle hole punch (I used a 20c coin)
  • toothpicks or popsticks (if you want 12 cupcake toppers, you will need 12 toothpicks/popsticks
  • glue/glue stick (non-toxic as it will be near your cupcakes!)
Trace around the coin with the pencil. Repeat until you have the required amount. Keep space between them (at least the same size as the circle). I have left the space to the left of the circle. Alternatively, punch out twice the amount of circles from the paper (ie. if you wish to have 12 cupcake toppers, punch out 24).


Cut between the circles to separate them. Fold the spare space underneath the circle.


Holding the folded paper together, cut around the circle, hence creating two circles at once.


There should now be two paper circles for each finished cupcake topper.


Flip over the circles to make sure that any pencil is not seen. Using the paint brush or cotton bud and the water colour paints, paint over each circle your chosen colour(s), keeping in mind that two circles will be required for each topper, hence if you wish to have a green background for a topper, paint two circles green. Allow to dry.


Next, draw a chosen design in the middle of each circle with the permanent marker (try out your design on scrap paper first to ensure that you are happy with the look). I chose a simple leafy plant motif to be displayed on my cake toppers, but you could choose anything! Some suggestions include: a love heart, a number (the age of the special person if it is a birthday celebration, eg. '40' for a 40th birthday), a letter (the initial of the special person), a star, a happy face, etc.

To create the same leafy plant motif, begin by drawing an ascending, wavy line.


Next, draw two little loops down the bottom of the wavy line. Draw each loop opposite each other, with the wavy line down the middle, separating them.


Keep drawing the pairs of little loops, ascending the wavy line...


... until there is no more wavy line and the top reached.


Now to assemble the toppers...
Carefully place glue on the back of two matching circles. Place the toothpick/pop stick in the middle of one of the gluey circles and place the other gluey circle on top, ensuring the motifs are facing up the right way. 
With your finger, rub the edge of the toothpick, pushing the paper gently against the edge of the toothpick to ensure that it is firmly in place and not wobbly. Allow to dry.

NOTE: As the bottom part of the topper will be poked into the food, try to keep it clear of glue and gluey fingers.


Finished! Something fairly quick and easy to make to add a special, persoanl touch to party food (with the bonus of being inexpensive).

Have fun creating!
~ Jen.

P.S - To see more craft tutorials, visit our Pinterest folder. Click here to see what is pinned.