Want to stay in touch? Become a 'Golden Ticket Member' (for FREE) for exclusive discounts + sales + freebies + news. Yes, please!
Showing posts with label unique. Show all posts

Tuesday, 7 June 2016

Introducing Fellow Madeit Seller - Lauren - from 'Ayana Jewellery'


As I love encouraging others, particularly those that handcraft items, I thought I would dedicate a blogpost once a month, sharing some information about other handcrafters that I have met.

This month I have great pleasure to introduce to you, Lauren from 'Ayana Jewellery'.

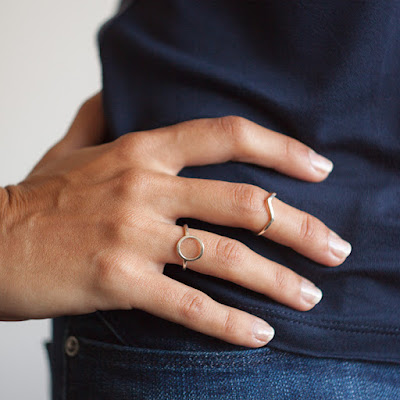
 Lauren is a very skilled jewellery maker that handcrafts rings, earrings, bracelets and necklaces. I met Lauren through the handmade market site, Madeit. I asked Lauren a few questions about her craft. Grab a cup of tea and enjoy reading about her journey ...


Tell us a bit about 'Ayana Jewellery'.

Behind Ayana Jewellery is myself and my partner Vincent. While I develop, design and handmake each item, Vincent supports me with the business side of things from marketing to bouncing ideas.
After studying as a silversmith in New Zealand, I moved to London where I met Vincent. Together
the journey of Ayana Jewellery began. I spend long evenings in my bedroom apartment making and designing jewellery. Vincent helping where he could.

We re-located to Sydney in early 2015 and re-launched Ayana Jewellery. We now design and make contemporary fashion accessories from our creative home studio in Neutral Bay (Sydney).
The artistic inspiration for our products comes from our travels. The ones ‘desire’ to see, feel, taste and yearn.
Resonating from cultural motifs to architectural shapes and forms.
Each jewellery item in our range is handcrafted with love from start to finish, with each piece not quite the same as the one before. We design and make with the fun loving women in mind and the idea that jewellery is to be worn and enjoyed every day. 


What do you like most about being a handmade designer/creator?


I predominately work with sterling silver (925) so popping on my apron and taking to the bench with saws, hammers and solder to bend, curve and form shapes making the jewellery come to life has to be my favourite part of being a creator. On the other side, I just love when I sell something and get awesome feedback from the customer - you never stop getting that little buzz!


Why did you choose to create jewellery?
I never really know how to answer this question - I just love jewellery and it fascinated me that I could create my own from a few lengths of wire, some sheets of silver and a soldering torch. After doing a night course I was hooked and went on to do a full-time course.


What is next? Do you have any new products/designs/ideas planned?
We have just started doing markets in Sydney which are awesome and a great way to interact with customers, so we'll be doing more of those in the next few months. We also have a new range of Drop Designs which we have tested at the markets, they will be going up online in the next few weeks.
Our plan for the next few months is to get our jewellery into a few more shops and get more locally handmade items out there whilst educating the customers so they can understand and appreciate "handmade". We are already stocked with Bonty in Canberra, Boxable Gift Boxes and will soon be in Manly Gallery.


Thank you Lauren for sharing about your handcrafting journey and your beautiful products. I love the simplistic, modern design of your jewellery and I wish you all the best in your endeavours.

If you would like to view more Ayana Jewellery products, simply click here to view what is in store.

Thank you for viewing!

~ Jen

P.S - If you have enjoyed reading about other handcrafters and want to know more about Tupsy Turvy Designs, why not become a 'Golden Ticket Member'? It is FREE and membership entitles you to regular updates, exclusive sales, discounts and opportunities. Simply click here and enter your email address. Easy! I look forward to sharing more ideas with you soon ...

Monday, 6 April 2015

A bookmark for Mum - Mother's Day gift craft tutorial


If you are like me, special days seem to sneak up on me. I like to make handmade items, but sometimes I leave creating until the last minute. By then, I don't have enough time and a frantic trip to the shops is in order.

This little craft project is made up in no time and it uses a lot of materials that are found around the house. The bonus in all this, is that even though this gift looks lovely, it involves minimal cost. This project is simple enough that children could even make up their own version to give to Mum!

Materials:

  • paper - I used an old book page, but any paper would suffice.
  • paints - a main colour and white to lighten it. I also used some watered down black paint for highlighting
  • scissors - normal scissors (I also used some fancy edging scissors, but this is optional)
  • brush - nothing fancy - anything to get paint down (a cotton wool ball would do)
  • something to mix paint on
  • decoupage glue - watered down PVA glue could work (test first)
  • scrap coloured paper to match your main colour - a used some pink and black in a picture on a magazine page.
  • ruler
  • pencil
  • black permanent pen
  • access to computer and printer (or use words out of a magazine) 
  • cotton bud
  • rub ons (optional)
  • hole punch and ribbon (optional)
Measure and cut out a rectangle of paper, slightly smaller than the size of your desired bookmark (mine was 14cm x 5.5cm).

Mix up two shades of your chosen colour - one darker (or straight out of the tube) and one lighter (mixed with some white). I chose pink and a light pink. Mix each colour with a small amount of water to make the paint thinner (about the same consistency as milk). I did this to get a 'watercolour' type of effect. If you desire the paint to be thicker, skip mixing with water.

Paint the lighter colour all over the paper with the brush or cotton wool ball, leaving about a 0.5cm border around the edge (no need to be too precise). Let dry a little (a hairdryer would help this process) and then paint splodges of the darker colour on top. Let dry.

Whilst the paint is drying, fold the scrap of coloured paper in half and cut out half a 'heart' shape, beginning at the fold (see above photo). This allows for a perfectly symmetrical heart when opened up. Repeat this process until you have 3-5 hearts (odd number amounts look better).

Arrange the hearts on the paper and once you are pleased with the layout, adhere with decoupage glue. Paint decoupage glue on the top of the hearts. Let dry.


Draw in some little hearts around the glued down hearts with the permanent marker (I used a fine marker). I also added a wandering line of dots. Outline the glued down hearts.


Using a computer, I typed out the sentiment 'I love you Mum' and printed it out (I like using a basic typewriter font). Cut up the words and glue them down with the decoupage glue (paint over the top as well). If you don't have access to a computer, cut out words/letters from newspapers/magazines. I added some rub ons, but this is optional.


Water down a tiny bit of black paint and apply it around the edge of the paper. I used a cotton bud for this. I added a little bit more watery black paint in the corners. Draw around the edge of the words with the permanent marker.


Adhere the bookmark onto the cardboard with the decoupage glue and apply a thin layer over the top. Let dry. Trim around the edge with some scissors (I used some fancy edging scissors).


If so desired, add a hole down the bottom of the bookmark with the hole punch and tie through some ribbon. I used three different types of pink ribbon.

Your bookmark is now finished!
You could possibly laminate the bookmark before adding the hole and ribbon to give the bookmark a little more strength.


I hope that this provides you with an inexpensive but unique gift option. You could team this bookmark with a book that Mum has been wanting to purchase or a gift voucher from a bookstore for the ultimate Mother's Day gift.

Have fun creating!

Wednesday, 18 March 2015

Grey and Red Mixed Media Greeting Cards

These cards are the latest addition to the grey and red collection...


These cards use the same mixed media techniques that are used on the canvases, but applied to reused collector cards. They are then adhered onto white card.


I enjoyed working with this colour combination. I love how the brightness of the touch of red shines through the hues of grey. Due to the colour scheme, I think these cards are suitable for male or female recipients.


To view the range of cards, click here. There is a discount for purchasing three cards from the range in store. To check this out, click here.

Thanks for viewing.